Mastering the Cake Box with Window Template for Professional Packaging
There is a distinct moment of pride when you hand over a beautifully baked creation, but that feeling can vanish instantly if the packaging fails to protect or present it properly. For bakers, hobbyists, and small business owners, the difference between an amateur presentation and a professional brand often lies in the details of the box. This is where a reliable Cake Box with Window Template becomes an indispensable tool. Whether you are crafting custom packaging for a weekend farmer's market or scaling up production for a local bakery, understanding how to select and utilize these digital files correctly is crucial for efficiency and quality.
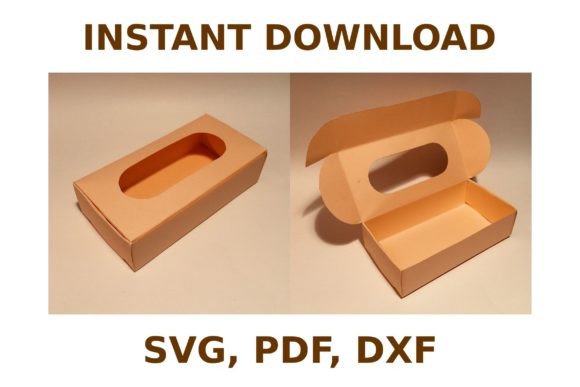
A Cake Box with Window Template is essentially a digital blueprint designed to be cut from cardstock or heavy paper. These files typically come in formats like SVG, DXF, and PDF, making them compatible with popular cutting machines such as Silhouette and Cricut. The "window" feature is particularly valuable because it allows customers to see the product without opening the box, maintaining hygiene while showcasing your decorating skills. However, simply downloading a file does not guarantee a perfect result. Many creators overlook critical variables that can turn a promising design into a frustrating waste of materials.
Common Pitfalls in Material Selection and Scaling
One of the most frequent mistakes beginners make is assuming that any paper will work with any template. A Cake Box with Window Template relies on specific structural integrity to hold the weight of a cake or cupcakes. Using standard printer paper or lightweight cardstock often leads to boxes that buckle under pressure or lose their shape during transport. Conversely, using material that is too thick can prevent the folding tabs from adhering properly or cause the cutting machine to struggle, resulting in jagged edges.
To avoid this, always check the recommended paper weight for your specific template. Most professional-grade boxes require cardstock between 65lb and 80lb cover weight. If you are unsure, perform a test run with a single sheet before committing to a large batch. Additionally, pay close attention to the note that measurements depend on paper size. Digital templates are often designed for standard letter or A4 paper. If you scale the image incorrectly within your design software to fit a different paper size, you may inadvertently alter the dimensions of the glue tabs or the locking mechanisms, rendering the box impossible to assemble.
Navigating File Formats and Machine Compatibility
The archive containing your template likely includes SVG, DXF, and PDF files. While it might be tempting to grab the first file you see, choosing the wrong format for your workflow can lead to significant headaches. For instance, opening a PDF in a vector editing program without proper conversion can result in lost layers or uncuttable lines. Similarly, importing an SVG into a machine that prefers DXF might require unnecessary cleanup of anchor points.
If you are using a Silhouette or Cricut, ensure you are importing the file type that preserves your cut lines and score lines distinctly. Score lines are vital for creating crisp folds; without them, you end up crushing the fibers of the paper by folding blindly, which weakens the structure. A common oversight is failing to separate the window cutout from the main box body in the software. If the window film or acetate is not accounted for in your material layout, you will find yourself with a hole in your box and no way to cover it. Always preview your cut matrix to ensure every element is mapped to the correct material setting.
The Importance of Testing and Quality Assurance
You may encounter templates claiming to be universal, but the reality is that not all designs are created equal. The statement that all templates have been tested for quality should be a key factor in your decision-making process, but you should still verify this personally. A template that hasn't been rigorously tested might have gaps in the cut lines, misaligned tabs, or window openings that are too small for the intended cake size.
Consider the scenario where a baker downloads a free template, cuts ten boxes, and only realizes upon assembly that the side flaps do not overlap sufficiently to hold the lid closed. This not only wastes money on materials but also delays order fulfillment. To prevent this, adopt a "prototype first" approach. Cut one box using scrap material to test the fit, fold ease, and overall stability. Check if the window aligns perfectly with the center of the cake placement area. If the template requires complex gluing, assess whether the tab sizes are practical for quick assembly during a busy rush.
Maximizing Efficiency and Brand Presentation
Beyond the mechanics of cutting and folding, how you apply the template affects your brand perception. A poorly assembled box with visible glue smudges or crooked windows undermines the quality of the baked goods inside. When using a Cake Box with Window Template, precision in scoring is just as important as precision in cutting. Use a blunt embossing tool or the score blade feature on your machine to ensure folds are sharp and accurate.
Furthermore, think about the finishing touches. The window area offers a prime spot for branding. Instead of leaving it bare, consider adding a custom sticker or a printed band around the box that complements the window view. This adds a layer of professionalism that generic store-bought boxes often lack. Remember, the goal is to create a seamless experience where the packaging enhances the product rather than distracting from it.
- Verify Dimensions: Always measure the physical height and diameter of your cakes against the internal dimensions of the assembled template, not just the flat file measurements.
- Check Tab Alignment: Ensure that glue tabs are long enough to secure the box but not so long that they interfere with the interior space.
- Test Acetate Fit: If the template requires a separate clear film for the window, cut a test piece to ensure it sits flush without bubbling or falling out.
- Review Cut Settings: Adjust blade depth and pressure based on your specific cardstock brand, as "cardstock" varies widely between manufacturers.
Ultimately, utilizing a Cake Box with Window Template is about balancing creativity with practicality. By avoiding common errors related to material choice, file handling, and assembly techniques, you can produce packaging that stands up to the rigors of delivery and delights your customers. Take the time to understand the nuances of your chosen template, run those essential tests, and refine your process. The result is a professional, custom packaging solution that elevates your baking business and ensures your creations arrive in perfect condition.