Creating a Timeless Evergreen Greeting Card SVG Project Without the Headaches
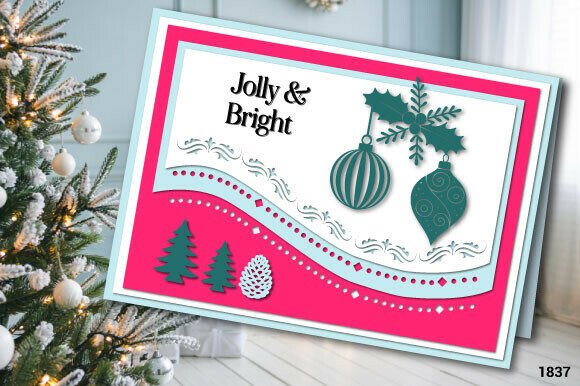
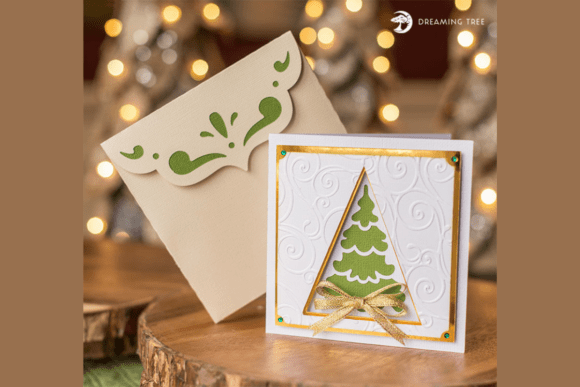
There is something uniquely satisfying about handing someone a greeting card that you made from scratch. In an era of digital notifications and mass-produced stationery, a handcrafted piece carries weight. It tells the recipient that you invested time, thought, and care into their holiday greeting. The Evergreen Greeting Card SVG has become a favorite among crafters for exactly this reason. It offers a timeless, elegant design featuring a beautifully layered evergreen tree, often accented with gold foil or rhinestones to catch the light. However, jumping into a layered paper project without a clear plan can lead to wasted materials and frustration. Whether you are a beginner picking up your Cricut or Silhouette for the first time, or a seasoned small business owner looking to streamline your holiday production, understanding the nuances of this specific design is crucial for success.
The appeal of this square-format card lies in its versatility. Designed for a 12×12″ cutting mat, it fits perfectly into standard crafting workflows. Yet, many creators overlook the importance of material selection and machine calibration before they even open the file. A common mistake is assuming that all cardstock behaves the same way. The design typically calls for specific weights and textures, such as Encore cardstock in Vanilla and Spinach, along with specialty papers like Gold Foil and Bazzill White Diamond. Using paper that is too thin can result in a flimsy card that loses its structural integrity when layers are added. Conversely, paper that is too thick might not cut cleanly, leaving you with torn edges that ruin the crisp look of the evergreen branches. Before you start cutting, always perform a test cut on a scrap piece of your chosen material. This simple step saves you from ruining an entire sheet of expensive foil paper.
Navigating File Compatibility and Sizing Issues
One of the most frequent points of confusion involves the file format itself. You will receive this design in SVG format only, accompanied by a PDF legend. While SVG is the industry standard for vector graphics and works seamlessly with software like Cricut Design Space, Silhouette Studio, and ScanNCut Canvas, issues arise when users try to import incompatible file types or misunderstand how resizing affects the project. The original dimensions are set at 5″ H x 5″ W, which is ideal for a standard square envelope. However, many crafters feel compelled to resize the project to fit different needs. While you can resize the project, it is vital to remember that the final dimensions may differ slightly from the original, and more importantly, the relative thickness of the cut lines does not scale proportionally. If you shrink the design too much, the intricate layers of the evergreen tree may become too delicate to weed or assemble without tearing.
Another oversight occurs when creators ignore the included PDF legend. This document is not just a pretty picture; it is your map for color selection and layer identification. Skipping this step often leads to assembly errors where layers are glued in the wrong order, obscuring the dimensional effect of the tree. The design relies on depth; the foam adhesive squares are meant to lift specific layers, creating shadows and highlights that make the tree pop. If you flatten these layers by using liquid glue everywhere, you lose the very feature that makes the Evergreen Greeting Card SVG stand out. Always keep the legend handy on your workspace and label your cut pieces if you are working on multiple cards at once.
Mastering the Assembly and Embellishment Process
Assembly is where the magic happens, but it is also where patience is tested. The design includes complex elements like a bow, which often requires a separate video tutorial to master. Many beginners rush through the bow creation, resulting in a messy centerpiece that detracts from the elegant tree. Take the time to watch the step-by-step video tutorial provided. These guides often reveal tricks, such as scoring the paper before folding or using a specific type of tweezers to hold small loops in place while the adhesive sets. Rushing this stage usually means having to redo the work, wasting both time and your supply of gold ribbon.
Embellishments like rhinestones and gold foil accents should be applied with a light touch. A common error is over-decorating. The beauty of this design is in its clean lines and the contrast between the spinach green and the vanilla background. Adding too many rhinestones can make the card look cluttered rather than festive. Think of these elements as seasoning; a little goes a long way. Place a single cluster of gems at the base of the tree or use them sparingly as "ornaments" on the branches. Similarly, when using hot glue for heavier embellishments, apply it carefully. Excess glue can seep out from under the layers, creating visible bumps or shiny spots that are difficult to hide. For lighter elements, foam adhesive squares are superior as they provide lift without the mess.
For those considering this project for a small business or holiday market stall, efficiency is key. Do not underestimate the time required for weeding and assembly. A single card might take 15 to 20 minutes to assemble properly once the cutting is done. If you plan to produce these in bulk, set up an assembly line. Cut all your vanilla bases first, then move to the green layers, then the foil accents. This batch processing method reduces the mental load of switching tasks and ensures consistency across all your cards. Additionally, ensure your embossing folder and ink pads are ready before you start. Dry ink or a worn embossing folder can yield inconsistent results, making some cards look vibrant while others appear dull.
Final Checks Before You Commit
Before you download or purchase any Evergreen Greeting Card SVG, verify the compatibility with your specific machine setup. While the file is universal, your machine's blade condition and mat stickiness play huge roles in the outcome. A dull blade will drag through gold foil paper, ruining the finish. Ensure you are using a fine-point blade for detailed cuts and a deep-cut blade if you decide to use heavier cardstock for the base. Also, check your software settings. Sometimes, the default pressure settings are too high for delicate foils, causing the machine to cut through the backing paper as well. Adjusting these settings based on the manufacturer's recommendations for your specific paper brand—whether it is Bazzill or Encore—can make the difference between a clean cut and a jagged edge.
Ultimately, the goal is to create a card that spreads holiday cheer with a professional, handcrafted touch. By paying attention to material quality, respecting the design's intended scale, and following the provided tutorials for complex elements like the bow, you can avoid the common pitfalls that plague many DIY projects. This Evergreen Greeting Card SVG is designed to be user-friendly, but it rewards those who approach it with preparation and care. Whether you are sending a winter greeting to a loved one or a seasonal thank-you note to a client, the result will be a stunning, dimensional piece of art that stands out in any mailbox. Take your time, trust the process, and enjoy the creativity that comes with bringing this elegant design to life.